Are you an Immerging Content creator or a video editor starting your career in the Video creation industry and struggling to keep up with the competition? Let me share a secret to creating high-end visuals and graphics to take your content game to the next level. The secret of many seasoned video creators and the movie industry is the use of Chroma Key in their content.
If you are not aware of the Chroma key or if you know about the Chroma key but don’t know how to use it then this guide is a treasure for you, because today you will learn how to add the Chroma key in Alight Motion and create unimaginable visual simply by using Chroma key effectively.
Alight Motion Pro APK is one of the most advanced video editing applications where you can add Chroma key and many other highly advanced features to your content on your smartphone. Chroma Key is one of the highly valuable and advanced features used mainly in Hollywood Blockbuster Movies, but Alight Motion has made this advanced feature available for everyone on their smartphone.

Have you ever watched a Sci-Fi movie scene and wondered how it is possible to shoot this masterpiece? Have you ever imagined how to create amazing visuals like the Dragons in the blockbuster season “The Game of Thrones”? Let me amaze you by saying that all of those amazing scenes are created using the Chroma key.
What is the Chroma Key in Alight Motion?
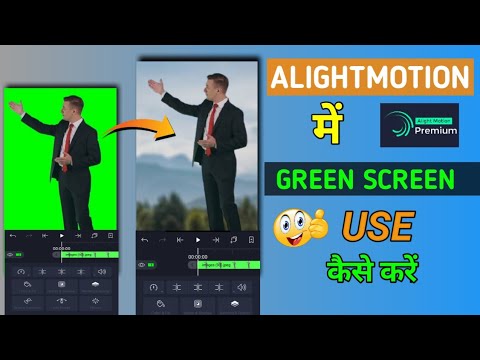
Chroma key is a technique by which you can hide a certain color and replace that color with something else like with an image, animation, video clip, etc. If you are a content creator then you must have encountered some videos where they shoot a person with a green background and then in the final video that green background is replaced by a different scenery. That is done by using the Chroma Key.
Nowadays almost every mainstream news channel is using Chroma Key for their background, Weather forecast channels are using Chroma Key, and it is reported that almost every Hollywood Movie created in 2009 has used Chroma Key for their scenes.
Today’s content creator must learn how to add Chroma Key in Alight Motion and use the functionality of Chroma Key in their content to create something extraordinary. The main concept is to shoot a clip with a green background and then replace that green Background with something else. Green and blue colors are mainly used in Chroma Key because these colors are the most a-part or different colors from human skin.

Science Behind Green Screen and Chroma Key
When we hear Green Screen editing, the first thing that comes to mind is removing green color from the background. This is correct, but there is a simple science behind this process. Chroma Key works by selecting one specific color from your video (mostly green or blue) and making that color transparent so another background can be placed behind the subject.
Green color is mostly used because it is very different from human skin tones and it is easier for editing software to detect this color clearly. If your subject is also wearing green color then some part of your subject may also get removed. That is why understanding this basic concept is very important before applying Chroma Key in Alight Motion.
Importance of Proper Lighting
Many users think Chroma Key is not working properly, but in most cases the main issue is poor lighting. If your green screen background has dark spots, shadows, or uneven light then Alight Motion cannot remove the background cleanly.
For best results, try to keep lighting equal on all parts of the green screen. Also keep enough distance between subject and green screen so shadows do not appear strongly behind the subject. If lighting is proper then keying becomes much easier and your final result will look smooth and professional.
Choosing the Key Color
Choosing the key color is one of the most important steps in green screen editing. In most videos, green is used as key color but sometimes blue background is also used based on the subject and scene.
In Alight Motion, when you use Chroma Key effect, select the exact green area from the background using the color picker. If you pick wrong shade of green then background will not be removed properly and some patches may remain. So always zoom in and choose the most common and clean color tone from your green screen.
Preparing the Video or Image Layer
Before applying Chroma Key, first prepare your project layers correctly. Add your green screen footage in the top layer and place your background video or image in the lower layer. This arrangement is necessary because after removing green background, the lower layer will become visible.
Also check that your foreground clip is clear and not heavily blurred. If the video quality is very low or compressed too much, then edges can break during keying. Preparing layers correctly from the start saves time and gives better output.
Steps to add Chroma Key in Alight Motion
If you are seriously thinking of adopting Video Editing or content creation as a career then you must learn to add Chroma Key in Alight Motion. It requires 3 steps to create stunning visuals using Chroma Key:
1: Chroma Key
Marking a color for the Chroma key, most commonly used colors are blue and green, follow the steps to mark and add a Chroma key in Alight Motion:
2: Keying
Keying refers to removing the Chroma key background, it will become transparent and now it is ready to be replaced by other elements.
Follow the steps mentioned in this video to remove the green screen background in Alight Motion.
3: Spill
This refers to a situation where the green light of the Chroma key reflects on your main object, this could reduce the quality of your video or make your video look unprofessional. You can follow these tips to avoid this:
Applying the Green Screen Effect
Now after project setup, it is time to apply green screen effect. Select your foreground layer (the one with green background), go to Effects, and choose Chroma Key. After that use color picker to select green background and start adjusting key settings.
At this stage, do not try extreme values. Increase settings slowly and keep checking preview. Your goal should be to remove green background while keeping subject details safe. If you increase settings too much then subject parts like hair and fingers may also disappear.
Adjusting Key Settings for Clean Cutout
After applying Chroma Key, you need to adjust settings carefully for better cutout. The most important controls are keying strength, threshold, and edge control (names can vary by app version). These settings decide how much background is removed and how clean your subject edges look.
If background is still visible, increase keying slightly. If subject starts breaking, reduce it. Always find balanced settings where green screen is removed but subject quality remains natural. This step needs little patience, but it gives the biggest quality improvement in final output.
Fine-Tuning the Key (Edges, Spill, Noise)
Fine-tuning is the step where your edit becomes professional. Even after removing background, sometimes green color remains on hair, clothes edges, or transparent objects. This is called spill. Use spill control to reduce this green reflection.
Also check edge sharpness and noise. If edges look too hard, reduce harshness. If edges look too soft, increase clarity slightly. Keep previewing your video on full screen while fine-tuning because small mistakes become visible after export.
Working with Green Screen Footage
Good footage always gives better chroma key results. If your original clip is shaky, low light, or low resolution then keying becomes difficult even with perfect settings. Try to record green screen videos in good light with stable camera and clean background cloth.
Avoid wrinkled green screens because folds create multiple green shades. Multiple shades make color removal difficult. If possible, use high quality footage with good FPS so motion edges remain smooth during editing.
Troubleshooting Common Issues
If your green screen edit is not looking good, then do not worry because these are common issues and they can be fixed:
These small corrections can improve your final result a lot.
Adding Backgrounds and Creative Effects
Once green background is removed, you can place any background image or video to match your scene. But for realistic output, only adding background is not enough. You should also match color tone, brightness, and shadow style of the subject and background.
You can enhance your edit by adding blur, glow, shadow, and slight motion effects so both layers blend naturally. If subject and background are not color matched, video looks fake. So always do final visual adjustments before export.
Exporting the Final Video in High Quality
After finishing your chroma key edit, the last step is export settings. Export your video in high quality so edge details and background blending remain clean. If export quality is too low then you may see artifacts around subject edges.
Choose suitable resolution and bitrate based on platform where you want to upload. Before final export, preview your full timeline once again to ensure no green patches, no broken edges, and no unwanted transparency are left. After that save and export in your desired format.
Conclusion
The Chroma key is one of the most useful features in video editing and Content creation, if you want to improve your content’s quality drastically then you must learn to add the Chroma key in Alight Motion. Explore what is Chroma key and follow the steps mentioned here to add the Chroma key in Alight Motion. Share this guide with others to help them improve their content as well.
Frequently Asked Questions (FAQs)
The Chroma key is a green background that could be replaced with other elements like images, videos, animations, etc.
Follow the steps mentioned in this video to remove the background in Alight Motion.


 5")


