Video graphics and animation is one of the most lucrative fields right now and with its growing popularity, it also brings a lot of competition. If you are also thriving to make a mark in this field, then you must explore how to use keyframes on Alight Motion.
In this comprehensive article, we will provide you with in-depth knowledge of Alight Motion’s Keyframe animations, from its basics to advanced functionality, Stick to this article, and you will have a complete pathway to becoming a pro.
AM MOD is the best option for video and Animation editors, The reason behind this popularity could be due to multiple reasons, but the most important factor is the keyframe animations, which could help you become a full-time Animation editor.
If you are e beginner or even a seasoned video editor this guide will add value to your knowledge and it will clear all of your concepts regarding keyframe animations.
What are Keyframe Animations?
Keyframe animation is the main component of creating motion graphics such as animations, it allows you the freedom to control the starting and ending points of an animation as well as to select the type of motion of that animation. With the help of Keyframe animations, you can alter many elements of your animations, such as their rotation, position, opacity, scale, etc.
For Example, if you have a ball and you want to make your ball bounce then you will use keyframes to mark the starting and ending point of that bounce, You will also have to mark the speed of your bounce and the type of motion that it will follow, such as linear, Ease-in, Ease-out, or Ease-in-out.
This is the basic concept of Keyframes in Alight Motion APK, to excel in keyframe functionality, one must have a grip on the basics of this feature.
Types of Keyframe Animations in Alight Motion APK
Different types of keyframes use multiple timing curves. Let’s explore some of the most used keyframe types:
Hold Keyframes
As the name suggests, hold keyframes are used to hold or keep the properties of an animation the same until this keyframe ends or the next keyframe starts. This kind of keyframe is preferred for creating sudden changes in rotation or position.
Linear Keyframes
Linear keyframes change the properties within the keyframe at a constant rate, they also help to create a smooth transition between two different keyframes. The example of a bouncing ball we discussed earlier could be created using linear keyframes.
Easing Keyframes
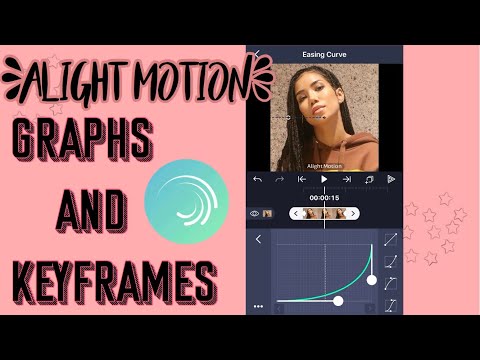
Instead of changing the properties of the element of the keyframe at a constant rate, which sometimes gives it an unnatural feel, easing keyframes gives a smoother experience by altering the properties at an increasing or decreasing rate. In my opinion, Easing keyframes are better than linear keyframes, as they give a more natural feel to the animation. There are 3 different types of easing animations, such as:
Ease in
Animation starts slowly and then increase its speed like a rocket flying, used in animations leaving a screen.
Ease Out
Animation starts rapidly and slowly reduces its speed to stop, it resembles the motion of a train arriving at a station, used for animations moving into the screen.
Ease in Out
Animations start slow, then speed up and again slow down and stop. This is used for animations that don’t leave the screen but move from one place to another on the screen.
Want to improve the overall experience of your video? Try exploring more about role of Aspect Ratio in any media.
How to use Keyframes on Alight Motion
As difficult as it sounds, it is easy to use keyframes in the Alight Motion APK. Try to follow all of the steps mentioned below:
Why use Keyframes in Alight Motion?
Animations are essential parts of content because they help to convey your message to your audience in a creative way. There are plenty of keyframe presets available for Alight Motion users, but if you want to excel in this field and want to make a name for yourself, then you must learn how to use Keyframes in the Alight Motion APK.
Keyframes are one of the advanced features of Alight Motion APK, and many professionals are using this technique to create their content in such a way that it stands out to others.
It gives you complete control over your dynamics, and you can decide how your content will be presented to your audience. If you are creating something unique and it is not available in the Alight Motion Presets, then you must have good knowledge of the basics of keyframes.
You can also create highly engaging videos by adding smooth effects to your animations, and you can also control various factors like tone, opacity, speed, etc. of your keyframes to make a unique piece of content. You can also create text animations using keyframes, and you can use animated text in your videos to improve user engagement.
You can also get Alight Motion APK for iOS as well!
How to Copy and Paste the Alight Motion Keyframes
You can copy and paste your frames to speed up your work and this will also improve the efficiency of your work as you will have more time to work on your project. Simply follow these steps to copy and paste your keyframes:
Advanced Keyframe Techniques Used in Alight Motion
The first step will be to get a firm grip on the basics of the keyframe, and after that, if you want to get your skill set one step ahead, you can start implementing these advanced techniques:
Tips to Master the Alight Motion’s Keyframes
Are you tired of trying different things but not getting satisfactory results? Worry not, because you can use these tips to improve your video editing skills and take them to the next level:
Troubleshooting some common Keyframe issues in Alight Motion APK
If Animations feel uneven or irregular
If the animation is feeling irregular, then try to improve the properties or settings you have used for Easing keyframes. If you have used linear keyframes, then you should switch to easing keyframes.
If Animations feel slow
This kind of issue happens when keyframes are placed far apart, and it may appear slow or laggy. Try to place more keyframes at regular intervals to get a snappy feel to your animation.
Conclusion
Mastering Alight Motion Keyframes could take your editing skills one step ahead, and if you want to create stunning and engaging content, then keyframes are a must-learn skill. Keyframes give you plenty of opportunities to play with, and you can create dynamic animations and give life to your imagination.
This guide has all of the details you need to become a pro at this skill from its basics to troubleshooting some common problems associated with it. Just keep in mind that practice makes a man perfect in any field, so take this guide as a starting point and practice it to polish your skills.
